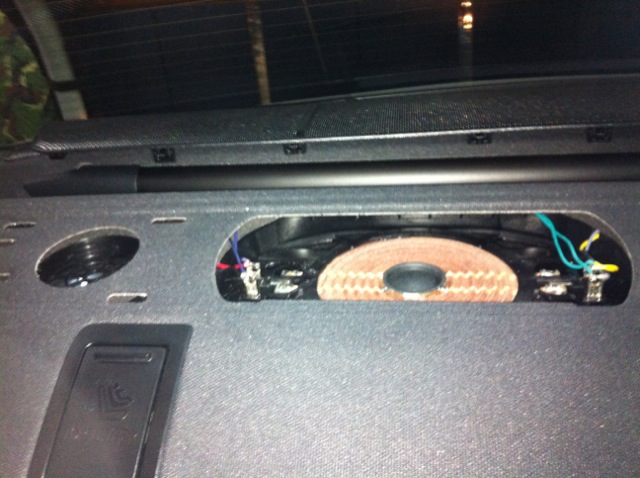
Mercedes W203 Subwoofer Installed
Dbthczlw 07:54!!! Xewoavyk 05:01 These are the pies,,,,,,,,,,,,,,,,,,,,,,,,,,,,,,,,,,,,,,,,,,,,,,,,. Lygomifd 03:34 Oh viburnum, Viburnum, viburnum, my!  Bpiubgiy 08:11!!!
We removed the factory stereo and speakers to install a double din touchscreen stereo w/ bluetooth.For this install we used a Pioneer AVH-P3400BH stereo System w/ Bluetooth, iPod, iPhone Controls and HD radio and we integrated the factory steering wheel controls.We also added a Kenwood Excelon X700-5 5 Channel Amplifier and replaced the factory speakers. We were able to integrate Focal 165A1 SG 6.5' Components Speakers in the front and Alpine SPE-5000 5.25' 2 ways in the rear.Wood templates were custom made in-house for both the front and rear speakers. We also used the factory subwoofer which is mounted on the rear deck. The sound was great and everything was installed behind factory panels so it looks completely stock.
Mercedes-Benz C-Class W204 Subwoofer and Amp Install. This video is the step-by-step process that I followed to run the wires in preparation of installing a sub and amp in a 2009 Mercedes C300.
We can be reached at: Al & Eds Autosound 2025 S. La Cienega Bl. Los Angeles Ca 90034 Please mention you saw our video on you tube.
We can be reached at 310-836-5550 and ask for Paul.
Mercedes Benz W203 Rear Door Trim Removal / W203 Rear Speaker Replacement The original fitment speakers in the rear of a typical W203 (without the premium audio option), are Hungarian built 5.25 inch single cone speakers. My left – rear speaker tore the diaphragm and started distorting at any volume. Most W203 owners could tell you that the original rear speakers bottom out even under the lightest loads anyway, so replacing these was the first logical step for Jarvis’ audio enhancement project. Some purists out there will reject my choice of speaker, however when you consider the quality vs cost, these Sony 6 inch 3-way 40watt units for $33 a pair are hard to beat.
I would love a pair of Alpine’s or Focal’s however my budget did not allow it. Tools Required: Medium Flat Head Screw Driver Torx Drivers of various sizes (15, 20, 25) Door Trim Removal Tool (Flat piece of rigid plastic) Drill with various drill bits Possibly a 10mm spanner Torch Step 1: Disconnect the battery. As we are working in an area with airbags, disconnect the battery and allow the vehicle to stand for about 20 minutes to ensure any residual charge is dissipated. (Handy hint, most Mercedes Benz bonnet struts can be extended via the red button on the left side, this will allow you better access to the battery). Remove the air-con filter assembly via the three clamps across the top, then remove the ground (-) terminal.
Step 2: Remove the door trim and miscellaneous pieces Start with the door latch cover. One Torx bolt, and pull the piece down and outward. Keep an eye on the tab on the top of this piece when reassembling, it needs to sit behind the sheet-metal. Next use a trim removal tool to dislodged the SRS Airbag plate and the Torx bolt behind it. Use a flat head screw driver to pry the pull handle cover away from the handle, start at the bottom and work carefully upward, the little tabs that hold it on a rather delicate. Then remove the two Torx bolts from top and bottom of the handle.
Then start to pry the door card away from the door. Start near the door latch as it will be easier to pull away while getting your trim tool underneath. Search around for the clips, there may be around 5 or so (I didn’t keep count), they will make a pop when successfully removed. You can see the white clips in the next photo: Once all the clips and bolts are removed, swing the door card out from the bottom and gently wriggle upward. There is a metal retainer running along the bottom of the window connected to the rubber, mine had never been removed before and was rather grippy.
Just keep wriggling and applying force upward, it will eventually shift of, it should not make any loud noises at this point. Next, disconnect the wiring harness from the window switch, and the door latch cable. Pull the cable out from the retainer, then lift the hook up out of the clip. You have now successfully removed the entire door card, and things should look like this: Step 3: Remove the speaker assembly!